
Media Management in Adobe Premiere Pro
This article describes how you can organize the material for transfer to the colorist from Adobe Premiere Pro in steps.
The main purpose of this article is to optimize the workflow between the editor and the colorist. Colorists, as well as editors, have rules and requirements of work processes, and the main thing we all want is to facilitate work tasks as much as possible.
Knowledge of such sets of requirements and rules will help you to be more successful in your future career, find new clients, count your recommendations as a technically competent specialist, as well as reduce the total cost of the project. Here I will tell you how to prepare your project in Premiere Pro in such a way that colorists want to work with you again and again.
Sometimes it happens that the correct Conform (comparison and fitting of raw material from an XML file) takes much more time than the color grading of the project itself. First of all, these are additional costs for the client, since the conform in these cases becomes one of the tasks for the colorist. By all means, this can create stressful situations, since the client expects that colorist will be engaged in color correction of the project after receiving all the files, but instead he spend time fitting and comparing clips on the timeline. Sometimes it can take several hours.
Since Premiere Pro and Davinci Resolve have different ways of processing editable data, it is not easy for projects to survive the journey from one software to another, while keeping everything intact. Therefore, in order to facilitate the journey of the project from Premiere Pro to Davinci, it is necessary to perform several simple but very important actions.
First of all, after finishing editing your project, create a separate copy that you will use to export and send to the colorist.
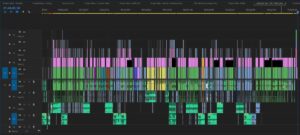
Simplify your sequence as much as possible.
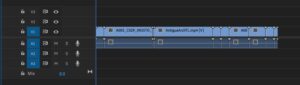
Arrange all your clips on one (maximum two) tracks.
▼
The next step is to follow these steps:
1. Make UnNest for all Nested Sequence.
2. Remove all effects/texts/graphics/empty tracks.
3. Remove the audio tracks, or leave only the master audio track.
4. Disable stabilization.
5. Reset all transformations/cropping/rotation (for this you can use the Remove Attributes tool for multiple clips at the same time).
6. Reset all parameters and dynamic keys for both Transformation and Retime/Speed Ramps (in this case, you will need to leave the entire range of the clip (in/out where retime/speed ramp was used) that was used in your sequence.
7. Disable all color correction/LUTs for LOG -> Rec709.
8. VFX transformation. Discuss in advance with the colorist in which color space the VFX will be produced. Make sure that all work on the VFX is completed before sending.
Now it remains for a small matter – to assemble a project for sending.
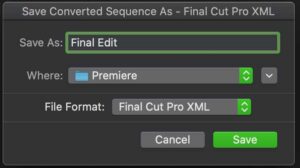
1. XML export. To do this, go to File > Export > Final Cut Pro XML …

Specify the name and location where to save your XML file.
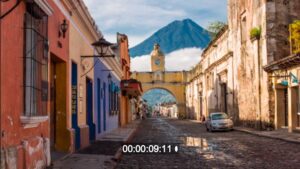
2. Export Offline Reference Video. This reference video is an export of your Premiere Pro timeline, on top of which the time code is displayed.
To do this, add an adjustment layer on top of your tracks and apply the Timecode video effect to it. Adjust the timecode format according to your sequence settings.

Next, export the video using Premiere or Media Encoder. To do this, go to the Export tab and specify the parameters as in the screenshot:
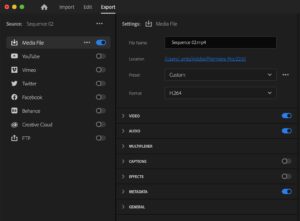
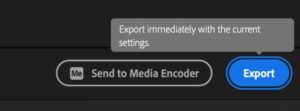
Click Export:
After the rendering is completed, the file must be copied to the same directory (you can create a subfolder “Reference File”) where the XML file created in the previous step is located.
3. Collect Files. Next, we need to collect all the raw material. To do this, go to File > Project Manager

Choose which sequence you need to Collect Files for. Next, specify the settings as in the screenshot:
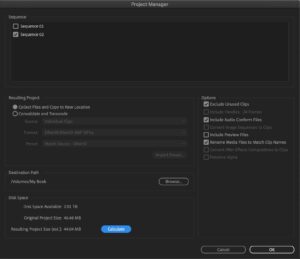
This way Project Manager will copy only those files that were used in your sequence, excluding unused ones.
Choose location. It is possible and desirable to specify the same folder where the XML and Reference file are located.

You can also click the Calculate button to find out the size of the files being copied.
After the copying is completed, the files are ready to be sent to the colorist.