
Media Management in Davinci Resolve
If you use Davinci Resolve for video editing, then this article will help you to prepare the material for sending to the colorist, as well as reducing size.
Important ! Please make a backup/ of your project before you start.
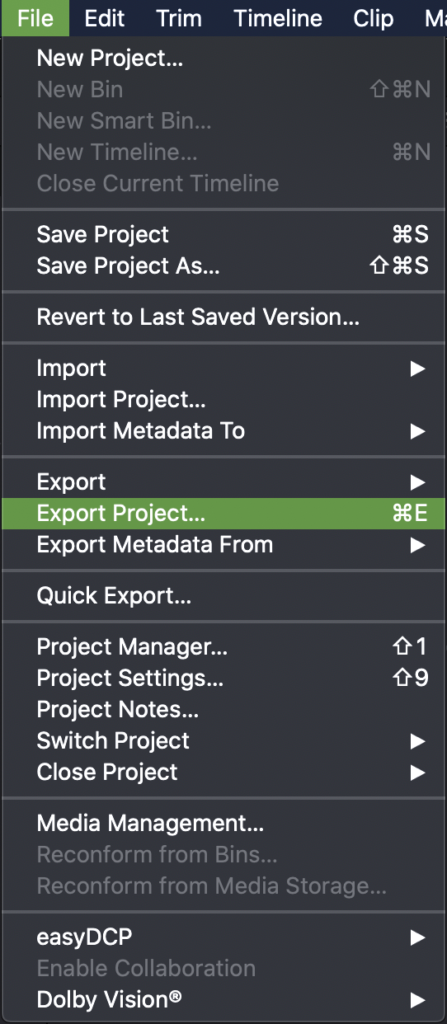
1. Export Project. First of all, we export the project from Davinci Resolve to a local disk. To do this, go to File > Export Project:
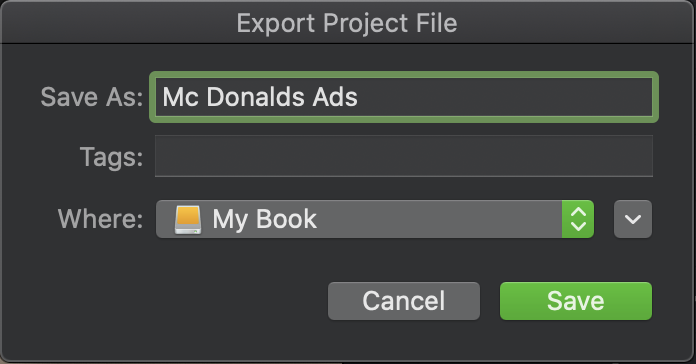
Specify the name of the project and where to save it:
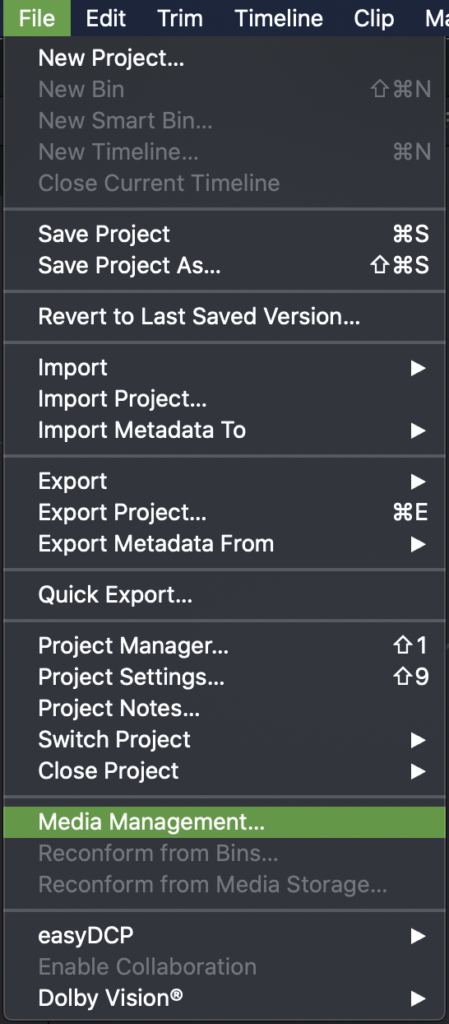
2. Copy and Trim. Go to File > Media Management:
If you have several timelines in your project, and you transfer all of them for color grading, then you need to specify the following settings:
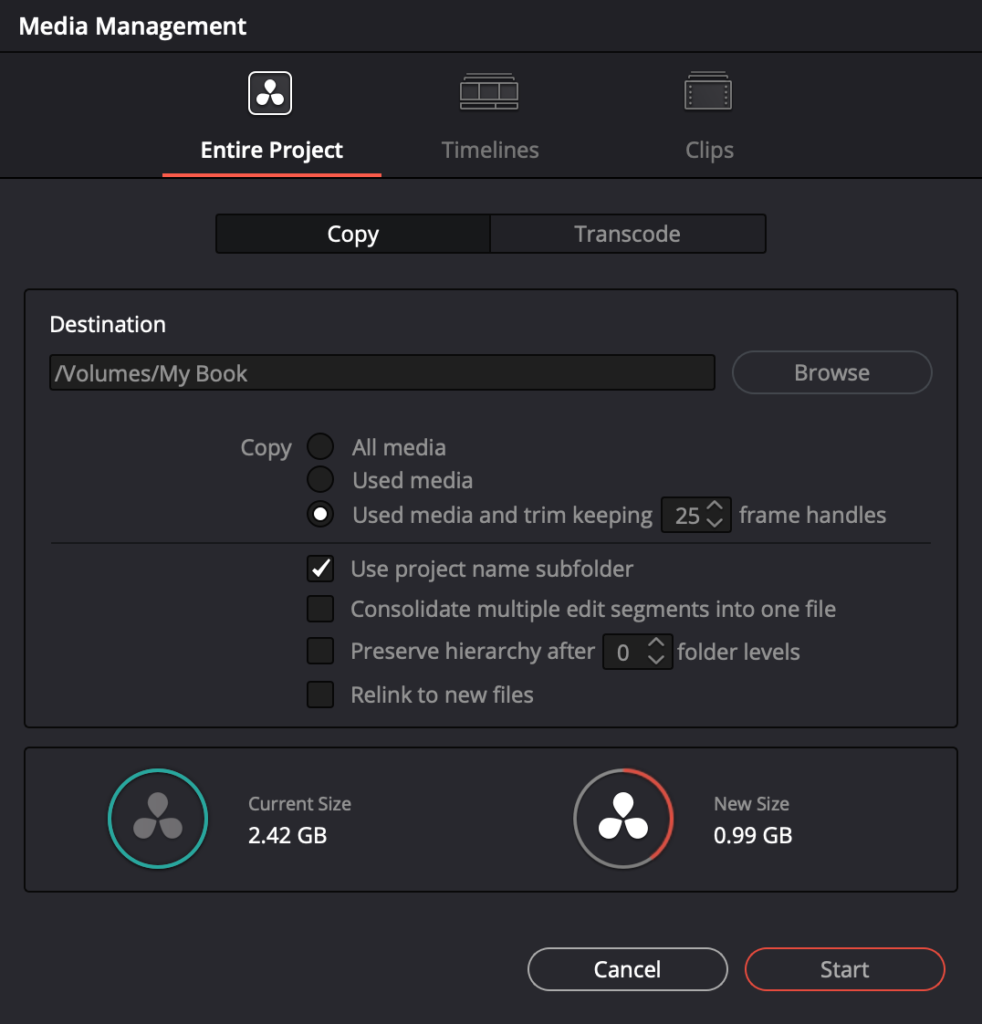
The switch “Used media and trim keeping 25 frame handles“ means that Media Manager will automatically copy and trim each clip that was used in the project (excluding unused ones), while leaving a margin of ”left“ and ”right” of 25 frames on each individual clip. You can specify a larger number of frames, while increasing the total volume of copied files. This margin is necessary, for example, if at the stage of color correction, the editing director decided to make changes and “move” one of the clips forward or backward for a couple of seconds.
If you have several timelines in your project, but you need to transfer only one for color grading, then you need to specify the following settings by selecting the necessary timeline:
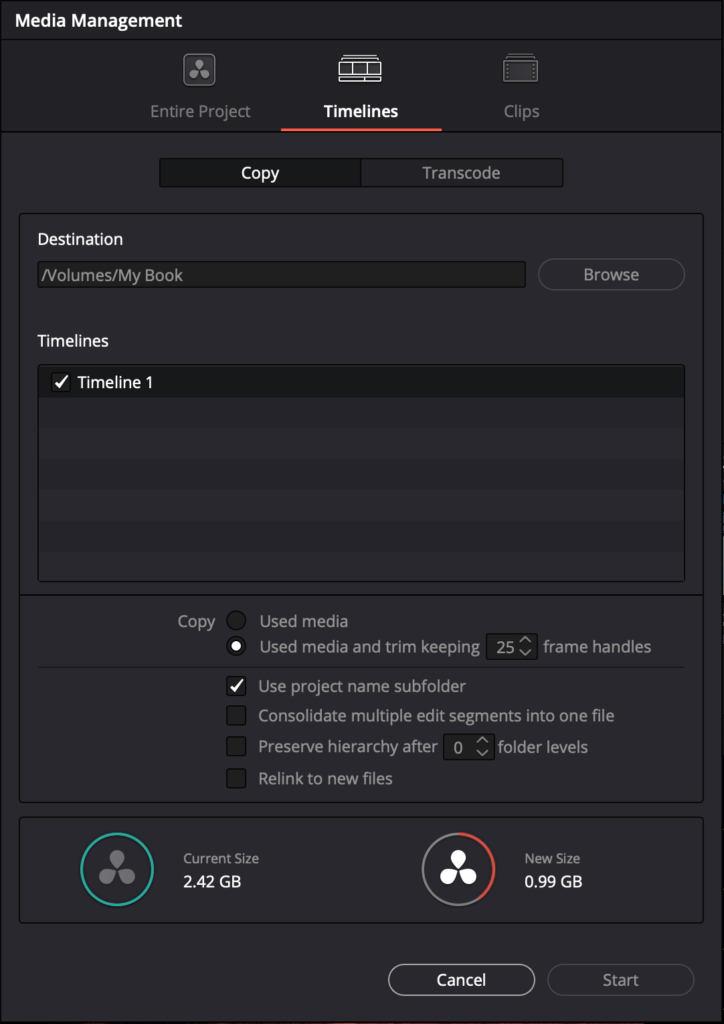
The switch “Used media and trim keeping 25 frame handles“ means that Media Manager will automatically copy and trim each clip that was used in the project (excluding unused ones), while leaving a margin of ”left“ and ”right” of 25 frames on each individual clip. You can specify a larger number of frames, while increasing the total volume of copied files. This margin is necessary, for example, if at the stage of color correction, the editing director decided to make changes and “move” one of the clips forward or backward for a couple of seconds
3.Only if you make a backup of your project, set on checker box “Relink to new files”
After that, you need to click Start, wait until the files are copied, after which they are ready to be sent.